
You’d be forgiven for wondering if a ‘pelvic tuck’ was the latest surgery touted by Hollywood stars or something you might hear in a pilates class, but it’s actually a lot more simple than that! The pelvic tuck is a quick and easy technique that ensures your baby is correctly seated in their carrier, ensuring they have optimal positioning and making it comfier for them and you!
Scroll down for a handy graphic.
Pro tip – save the images to your camera roll for easy double-checking while you’re out and about as it’s a great idea to do a pelvic tuck every time you pop your baby in the carrier.
Front Inward Facing
| 1. | 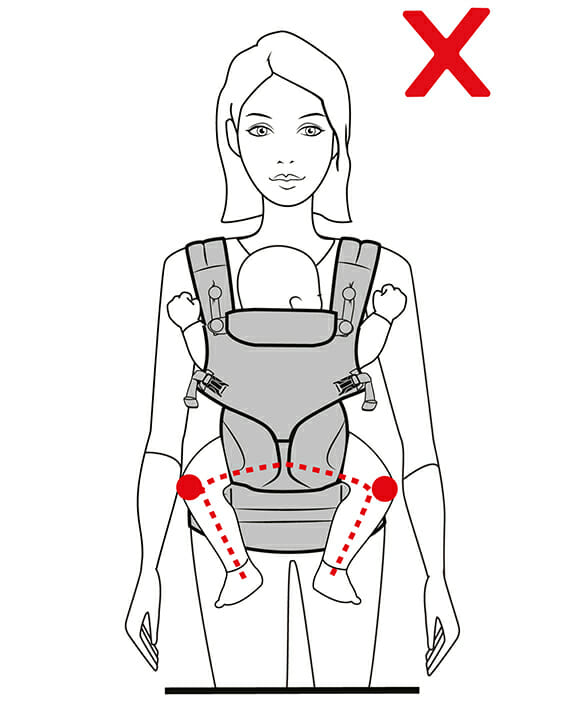 |
We recommend doing a pelvic tuck every time your baby goes into the carrier but here’s a couple of visible signs you can look out for:
|
| 2. | 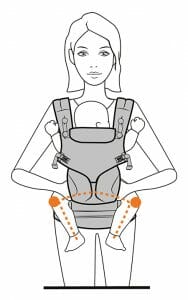 |
Insert hands under your baby’s upper thighs. |
| 3. | 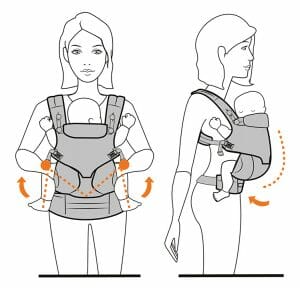 |
Rotate your baby’s hips towards your body to sit them deeper into the seat. Weight should be on the baby’s bum with the knees higher than his/her bum. This forms an “M” shape. |
| 4. | 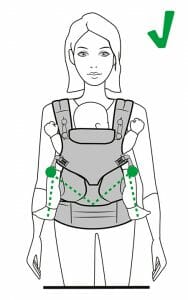 |
Your baby should now be seated comfortably with the carrier supporting them from knee to knee. |
Outward Facing
| 1. | 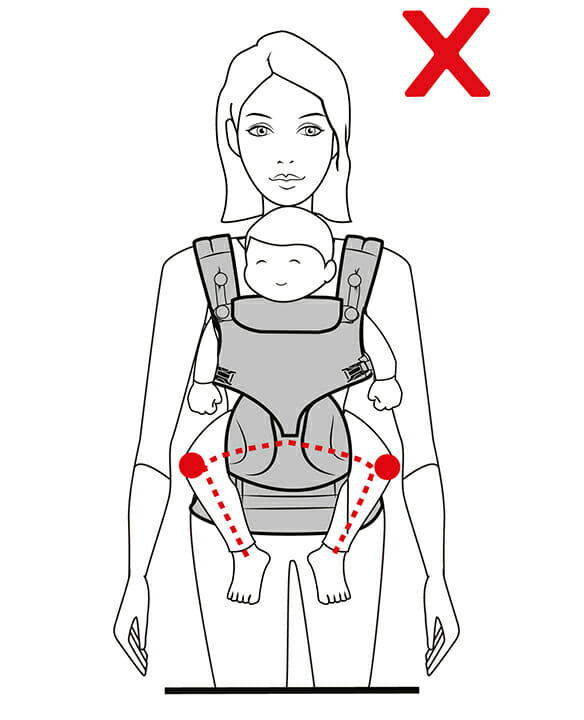 |
We recommend doing a pelvic tuck every time your baby goes into the carrier but here’s a couple of visible signs you can look out for:
|
| 2. | 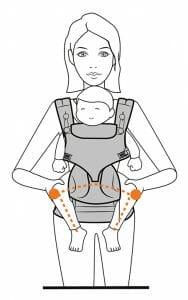 |
Insert hands under your baby’s upper thighs. |
| 3. | 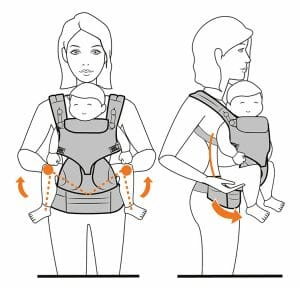 |
Rotate your baby’s hips away from your body to sit them deeper into the seat. Weight should be on the baby’s bum with the knees higher than his/her bum. This forms an “M” shape. |
| 4. | 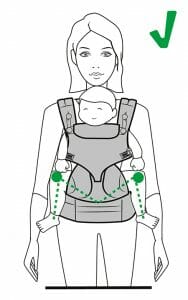 |
Your baby should now be seated comfortably with the carrier supporting them from knee to knee. |
And the same rules apply for hip and back carry positions too! If you need any more help or advice on your baby’s positioning don’t forget you can always email our qualified Babywearing Consultants at [email protected] or get in touch via Facebook.


